Inventory Creation Wizard
This guide explains how to use the multi-step wizard to add new products and their variations (like different sizes or colors) into the inventory system. This tool is designed to be flexible, whether you're adding products from an invoice or just adding physical stock you have on hand.
The Workflow
The process is broken down into a series of simple steps. You will be guided from one step to the next until your new inventory is saved.
Step 0: Choose Your Entry Method
This first step asks how you want to begin adding your inventory.

- Enter by Invoice: Choose this if you are adding products that you've received from a supplier and have an invoice or purchase order for. This helps track where your inventory came from.
- Enter Physical Products: Choose this if you are adding existing stock and don't need to associate it with a specific invoice or vendor at this time.
Step 1: Invoice Details
This step only appears if you selected "Enter by Invoice" in Step 0.
Here, you'll link the new products to their supplier and paperwork. This is crucial for accurate record-keeping.

- Vendor Name: Select the supplier you received the products from in this dropdown menu.
- Invoice Number: Select an existing invoice from the dropdown or type a new invoice number. If you type a new number, a "Create" option will appear—click it to use the new number.
- Purchase Order (PO) No.: This works just like the Invoice Number. You can select an existing PO or create a new one by typing.
Smart PO Linking: If you select an invoice that is already linked to a purchase order, the system will automatically fill in the PO field for you and lock it to prevent mistakes.
You must fill out all three fields to proceed to the next step.
Step 2: Product Type
This step defines the basic category of the product you are adding.

- Product Type Dropdown: Select the type of product, such as "T-Shirt," "Coffee Mug," or "Apple."
- Create New Product Type: If the type you need doesn't exist yet, click this link. An input box will appear where you can type the name for the new product type and click "Create".
You must select a product type to continue.
Step 3: Product Variations
Here, you'll tell the system if the product comes in different versions.
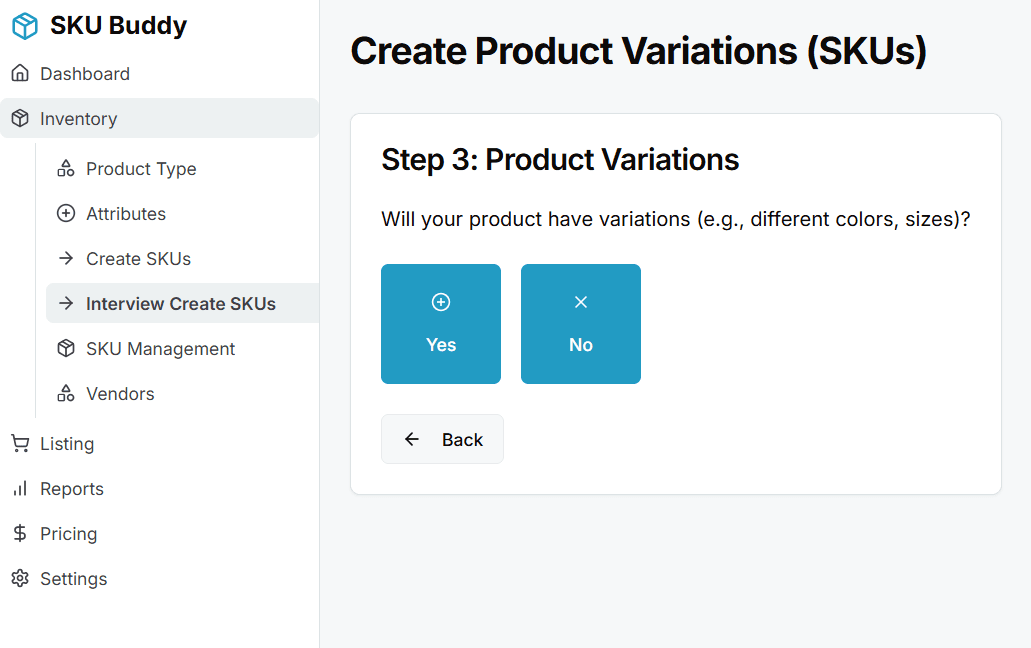
- Does the product have variations? For example, a T-shirt might have different sizes (Small, Medium, Large) and colors (Red, Blue).
- Click Yes if it does. This will take you to a screen to define those variations.
- Click No if it's a single, standard product with no variations (e.g., a specific book). This will skip the next two steps and take you directly to the review page.
Step 4: Attributes & Options
This step only appears if you selected "Yes" in Step 3.
This is where you define what makes your products different from each other.
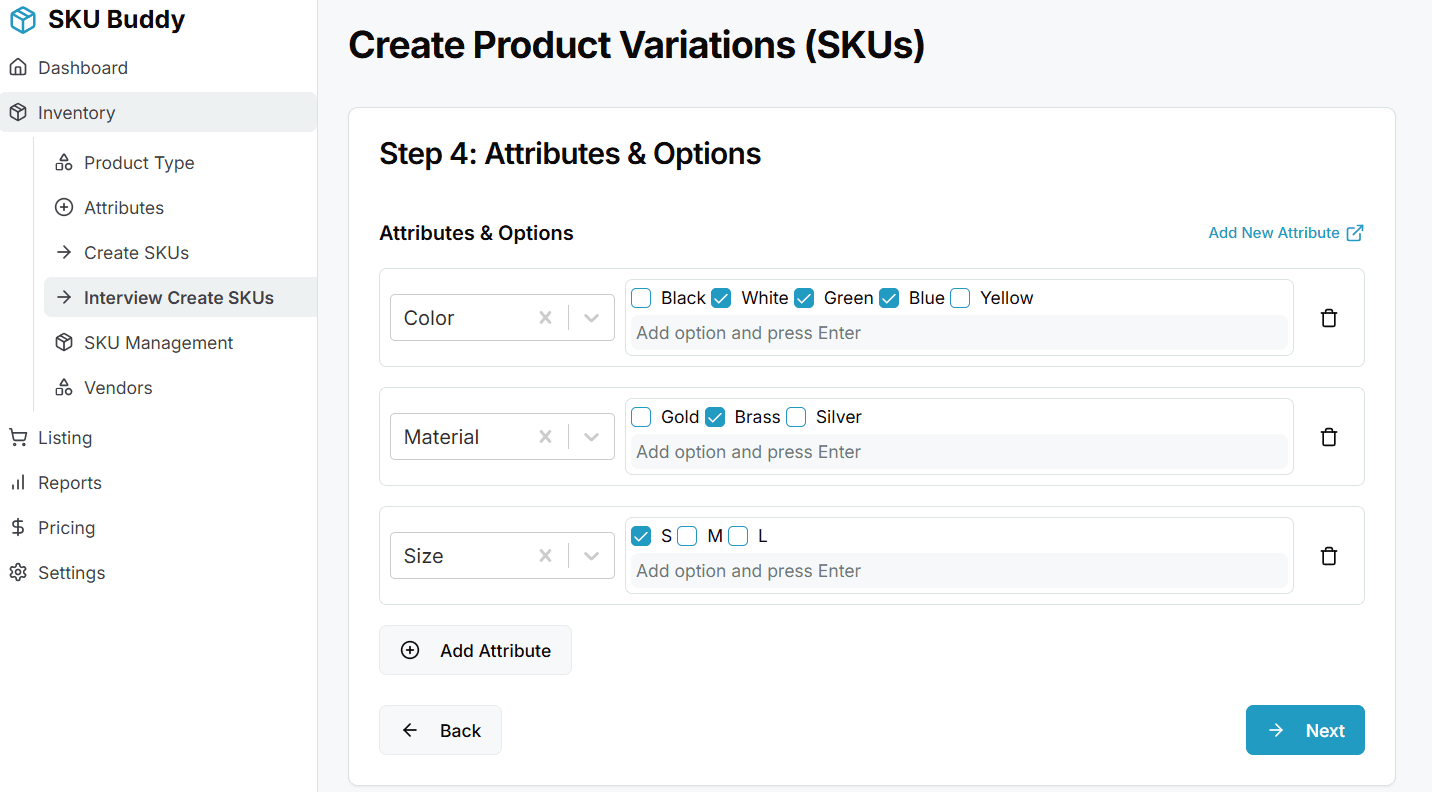
- Attribute: An attribute is a category of variation, like "Color" or "Size".
- Click Add Attribute to start.
- In the dropdown that appears, select an existing attribute or create a new one by typing its name (e.g., "Material") and clicking the "Create" option.
- Options: Options are the specific choices within an attribute, like "Red" and "Blue" for the "Color" attribute.
- The system will show all available options for a selected attribute as checkboxes. Simply check the ones you have in stock.
- To add a new option (e.g., the color "Yellow" isn't on the list), type "Yellow" into the input box and press Enter. The system will automatically add it to the list of options for that attribute and save it for future use.
You can add multiple attributes (e.g., one for "Color" and another for "Size").
Step 5: Generate Variations
Based on your choices in the previous step, the system automatically creates a list of all possible product combinations. Your job here is to remove any combinations you did not receive.
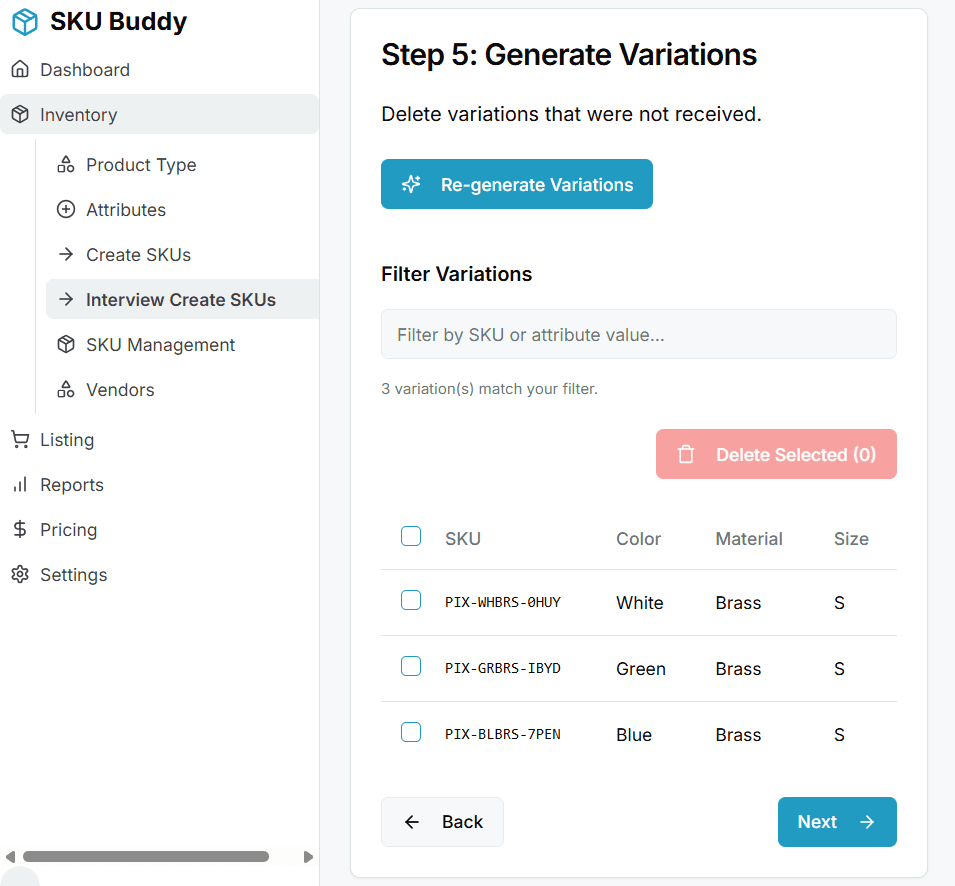
- Example: If you selected "Color" (Red, Blue) and "Size" (Small, Medium), the system will generate: Red-Small, Red-Medium, Blue-Small, and Blue-Medium.
- Your Task: If you didn't receive the "Red-Medium" shirt, you would remove it here.
- How to Use:
- Filter: Use the search box to quickly find specific variations.
- Select: Check the box next to any variation you want to remove. You can select all filtered items by checking the box in the table header.
- Delete: Click the Delete Selected button to remove them from the list.
Step 6: Review and Edit Variations
This is the final and most important step for data entry. Here you will add the specific details for each product variation you are adding to your inventory.
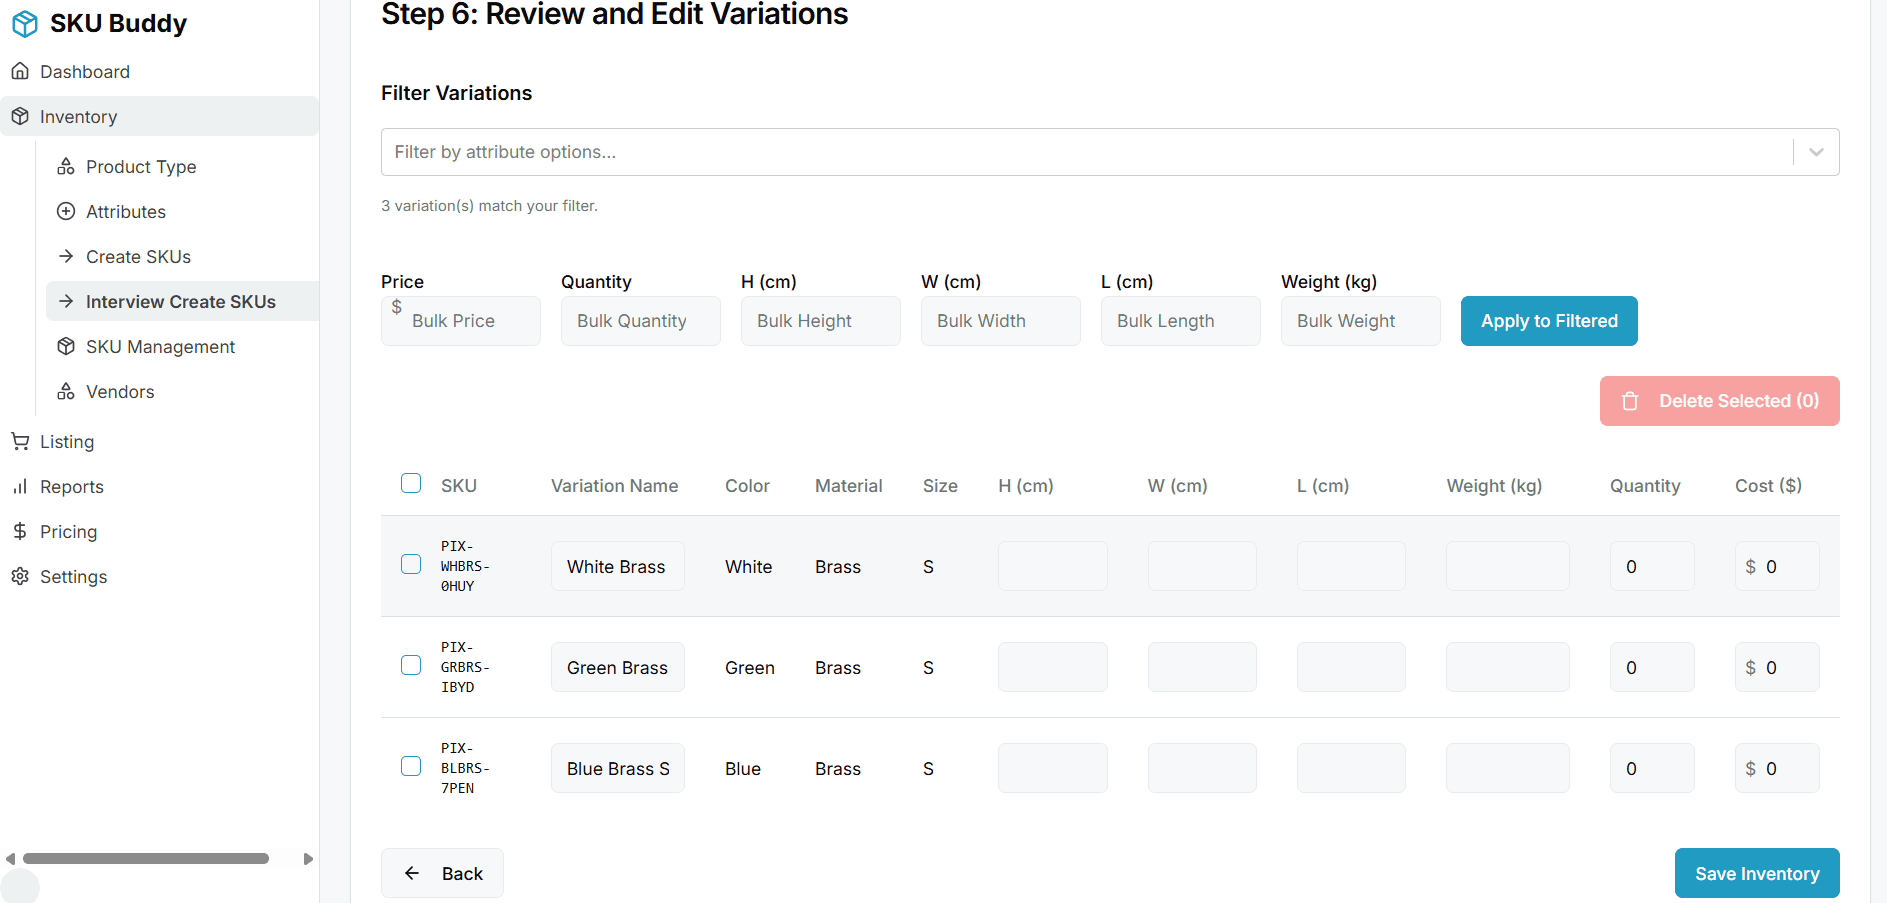
Filtering and Bulk Updates (Time-Saving Feature)
Instead of editing every item one-by-one, you can edit them in groups.
How to Bulk Update:
- Filter your list: Use the "Filter by attribute options" dropdown at the top to narrow down your list. For example, select "Red" to see only the red-colored variations.
- Enter Bulk Values: In the input boxes above the table (Bulk Price, Bulk Quantity, etc.), type the value you want to apply.
- Apply: Click the Apply to Filtered button. The value you entered will be applied to all the items that match your filter. For example, you can set the cost for all "Red" items to $10.00 in one click.
The Variations Table
This table lists every final variation. You can edit the following for each item:
- SKU: A unique code for the product, automatically generated by the system.
- Variation Name: A descriptive name, like "Red Small T-Shirt".
- H, W, L (Height, Width, Length): The product's dimensions.
- Weight: The product's weight.
- Quantity: How many units of this specific variation you are adding.
- Cost: The cost per unit for this variation.
When you are finished, click Save Inventory.
Step 7: Success!
Once you save, a confirmation window will appear.
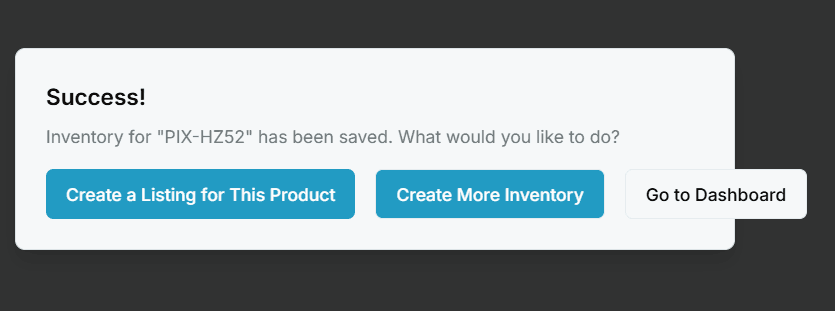
You have successfully added the new products to your inventory! From here, you have three choices:
- Create a Listing for This Product: Go directly to the page for creating a new sales listing.
- Create More Inventory: Start the wizard over again to add another batch of products.
- Go to Dashboard: Return to the main dashboard.